How to Mark a Member Inactive or Deceased in ChurchCRM
A family calls the office to let you know their grandmother passed away last week. Meanwhile, a member who hasn’t been to service in over a year is still listed alongside your most engaged families, with nothing to distinguish one from the other. Neither situation calls for deleting a record — it calls for updating one. ChurchCRM gives you two distinct tools for this: marking a member inactive and recording a member as deceased.
They’re not the same thing, and they’re not edited in the same place. Here’s how each one works.
Marking a Member Inactive
Setting a member inactive is a quick toggle from their profile — no need to open the full edit form.
Step 1: Find the member
Go to People → People to open the directory, and search by name. Click their name to open their profile.
Step 2: Open the Actions menu
On the profile page toolbar, next to Edit and Print, click Actions (the button with the vertical-dots icon).
Step 3: Choose “Set Inactive”
Select Set Inactive from the dropdown. A confirmation dialog appears, asking you to confirm deactivation for that person by name — a small safeguard against clicking the wrong record.
Step 4: Confirm
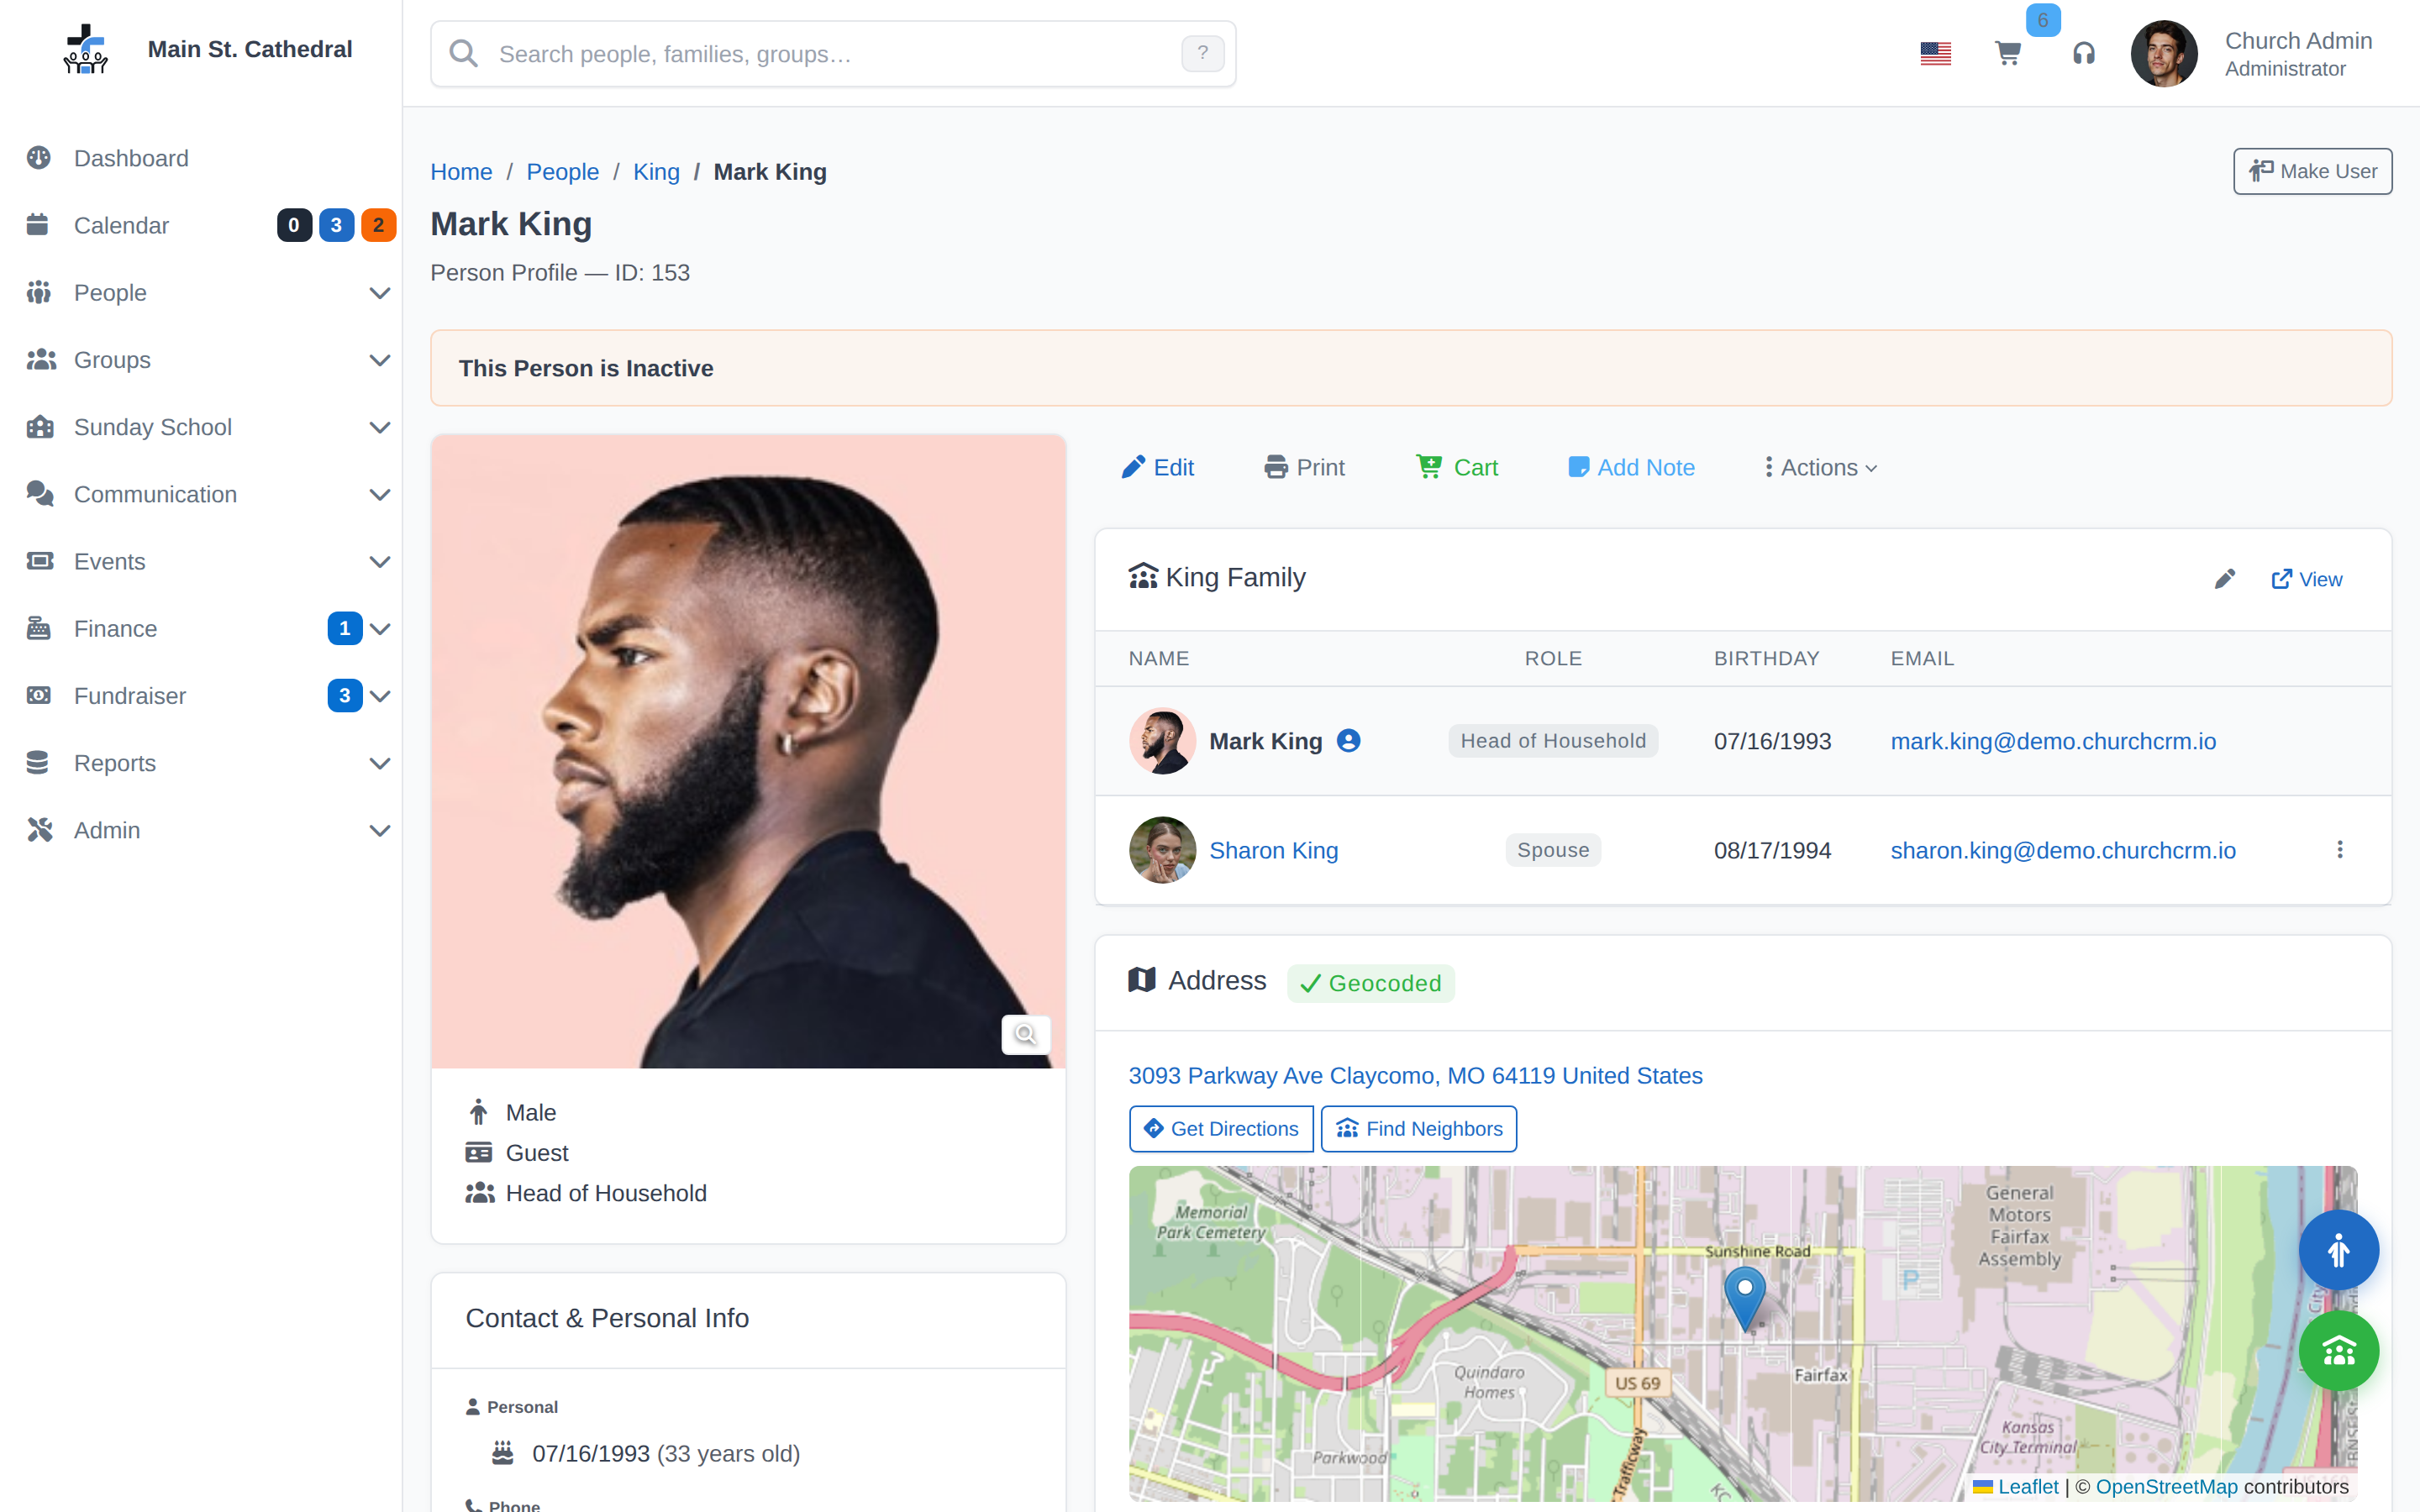
Click Confirm. The page reloads, and a warning banner — “This Person is Inactive” — appears at the top of their profile.
That’s it. No date to enter, no form to submit. Behind the scenes, this sets a deactivation timestamp on the person’s record via a single API call, which is also what reactivating them later reverses (the same Actions menu will show Set Active instead).
One detail worth knowing: you can’t deactivate yourself. The option only appears when you’re viewing someone else’s profile.
Recording a Deceased Member
Marking someone deceased carries more weight than a status toggle, so it lives in the edit form alongside a date — not as a one-click action.
Step 1: Open the Person Editor
From the member’s profile, click Edit.
Step 2: Check “This person is deceased”
Scroll to the Deceased field. Check the box labeled This person is deceased — a date field appears directly below it once checked.
Step 3: Enter the date
Type or pick the date of death. ChurchCRM validates that this date isn’t in the future, so a typo like next year instead of last year will be caught before you save.
Step 4: Save
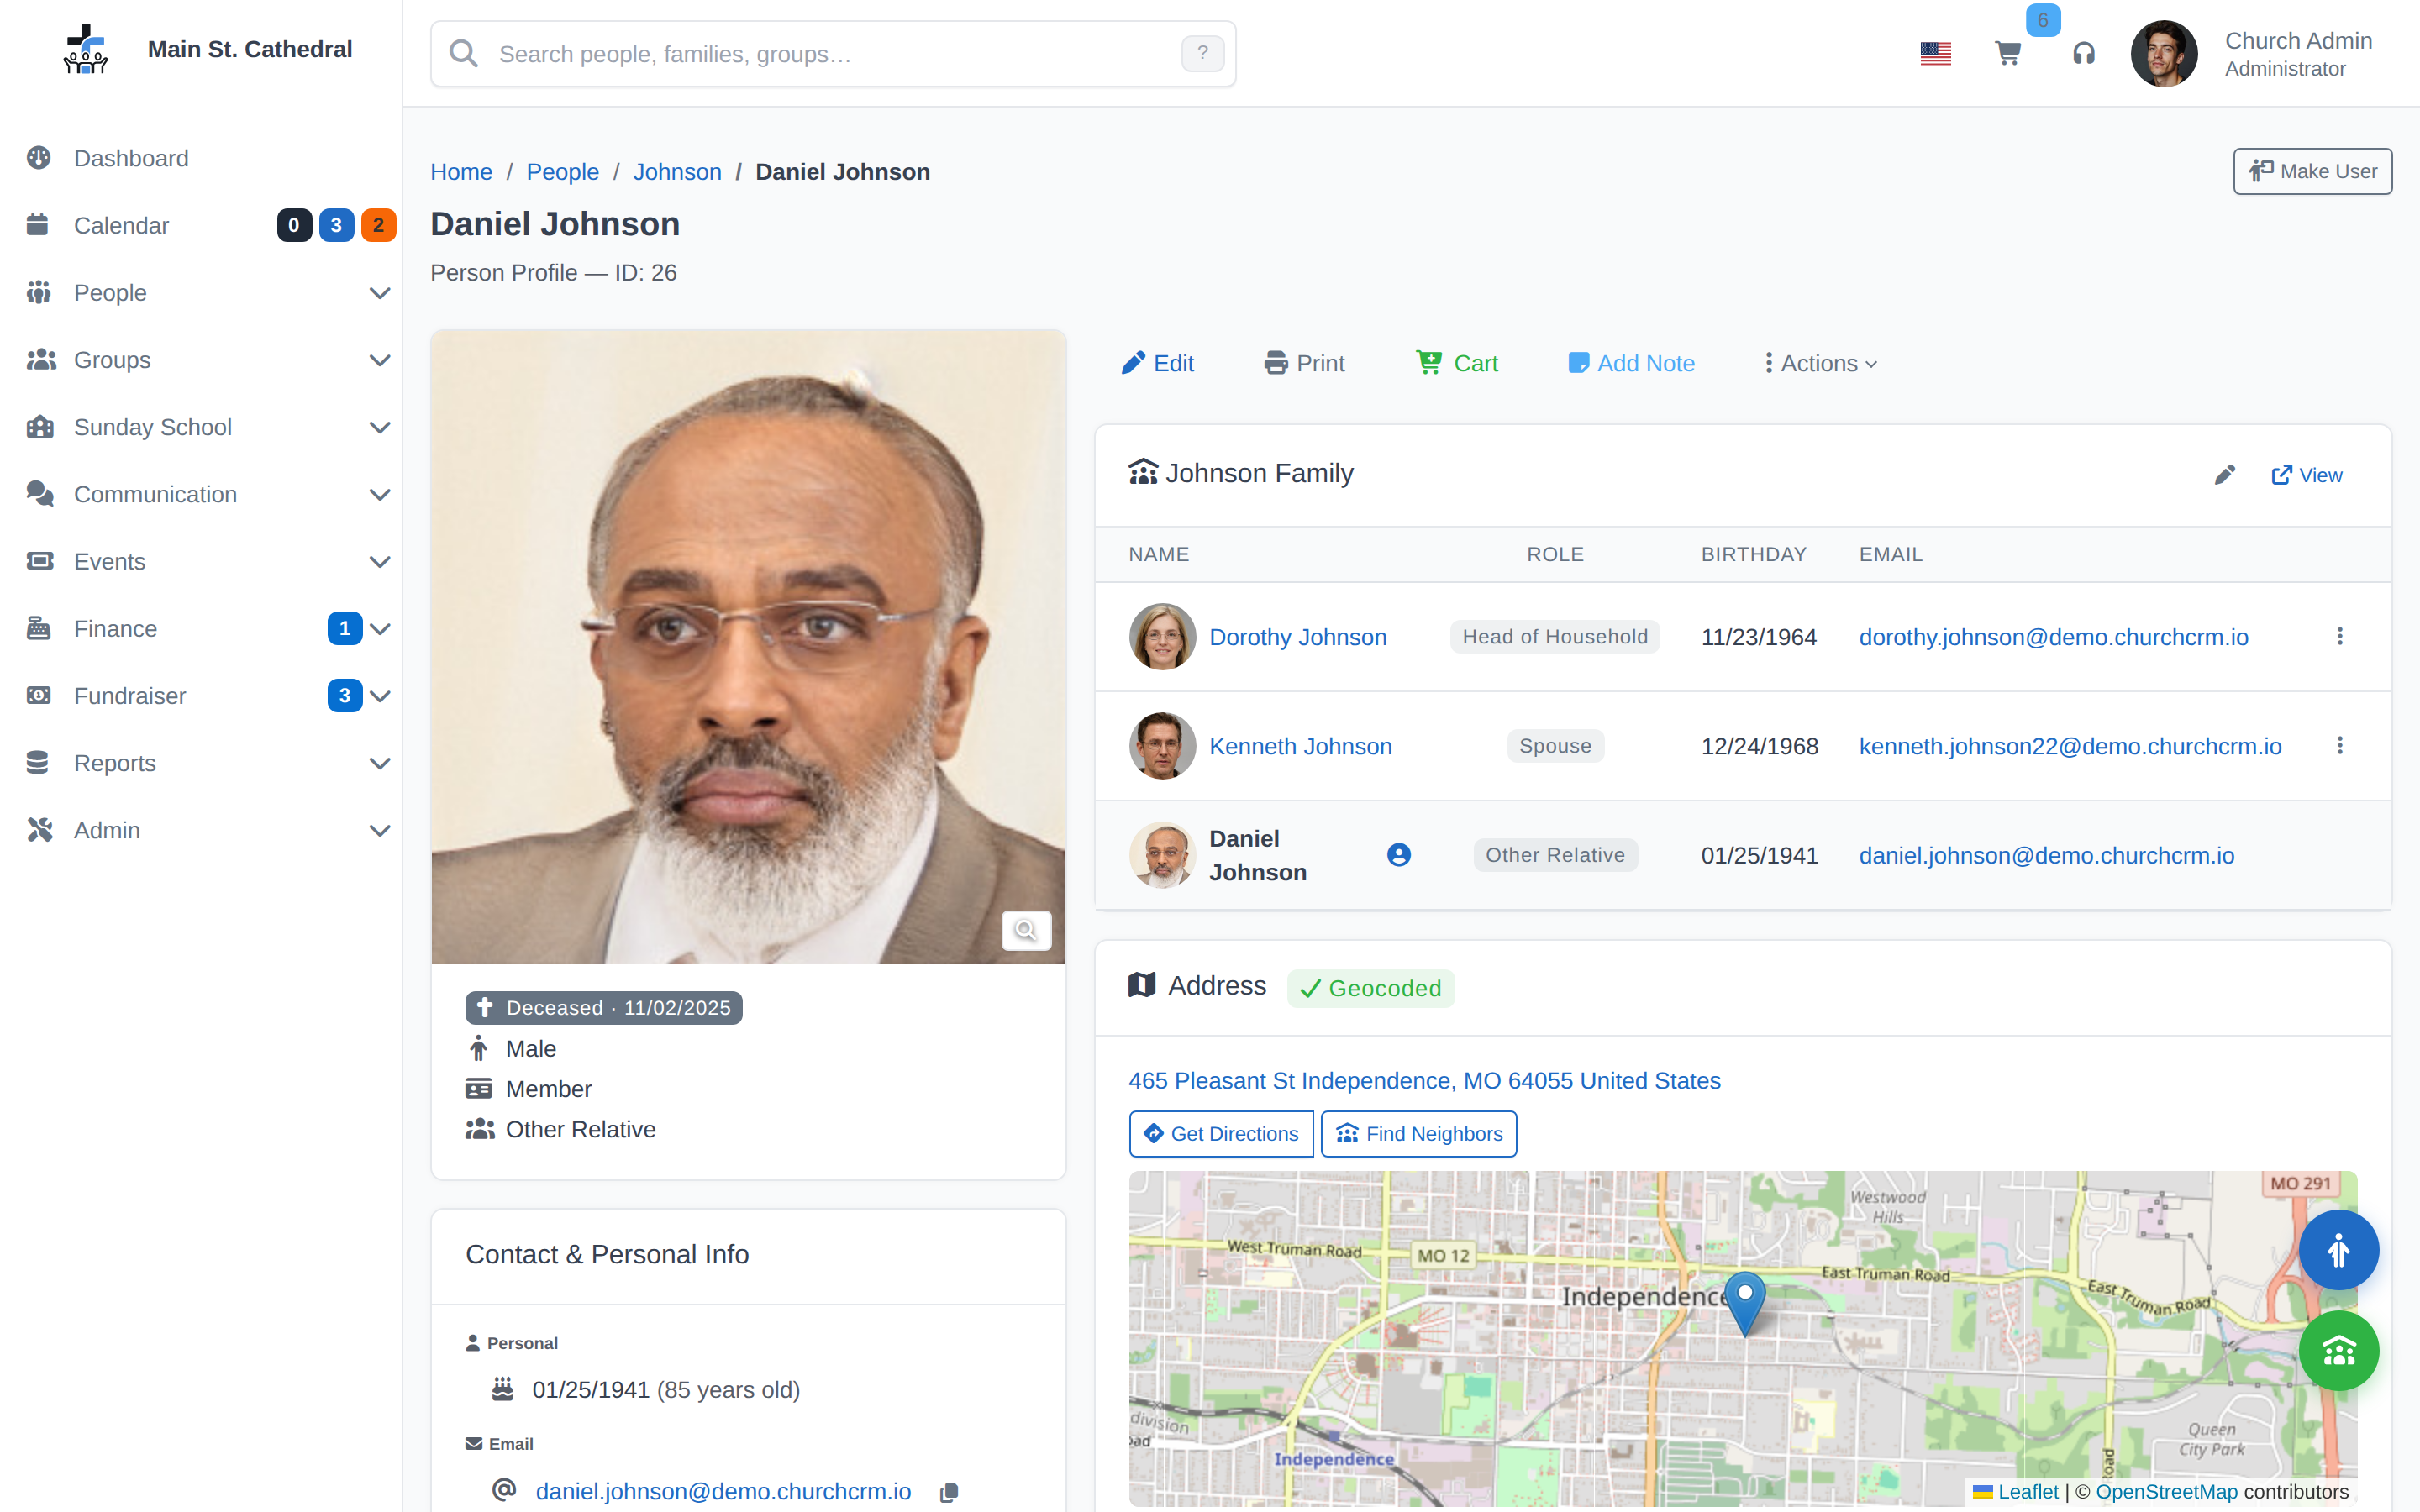
Click Save. Their profile now displays a Deceased badge with the date next to their name and photo card.
Where These Statuses Show Up
Neither status hides someone from your records — deletion is a separate, much more permanent action. Instead, both are visible markers throughout the People directory:
- Inactive members get a small “Inactive” badge next to their name in list views.
- Deceased members get a “Deceased” badge with a cross icon next to their name, and the date shows on their full profile.
- The People directory’s filter panel includes a Deceased filter (Living / Deceased), so you can pull up just your deceased records — useful when compiling a memorial list or reviewing historical membership.
Because both members stay in the directory rather than disappearing, your reports, family records, and giving history stay intact. You’re recording a status change, not erasing someone from your church’s story.
Why This Matters for Ministry
Clean status data is pastoral care, not just record-keeping. When a deceased badge shows up on a profile, a volunteer pulling names for a card or a call knows at a glance to route that family toward the care team instead of the next event invite. When an inactive badge flags someone who’s drifted, it’s a quiet prompt to reach out rather than count them in this week’s momentum. Thirty seconds spent updating a status keeps your records honest and your care team paying attention to the right people.
For more on managing your People directory, visit our Documentation. ChurchCRM is free, open-source church management software used by congregations worldwide.